Ever had that heart-sinking moment when your ATV decides it’s not in the mood to kick into action? Fear not, because we’re about to decode the causes of your ATV not starting and offer tested fixes.
First up on the list is the trio of fuel, air, and spark. And a weak or drained battery renders the machine powerless and unwilling to roar to life. Wait, there’s more! Enter the realm of electrical issues. Say, the kill switch might be deciding to play dead, or the starter solenoid might be channeling its inner diva. And then there are the mechanical hiccups – the clogged carburetor and the moody ignition coil.
So, the next time your ATV decides to stay parked, remember it’s just a symphony of fuel, air, spark, battery power, electrical quirks, and mechanical drama. Now, stay calm and get ready for a deep dive into the reasons and the potential solutions.
Jump To Contents
- ATV not Starting – 14 Common Reasons & Smart Solutions
- 1. Check Battery
- 2. Fuel System Examination
- 3. Engine Compression Evaluation
- 4. Fuel in the Tank
- 5. Confirm the ATV is Not in Gear
- 6. Check Kill Switch
- 7. Test the Starter Solenoid
- 8. Inspecting the Carburetor
- 9. Troubleshoot Fuel Injection
- 10. Issues in Ignition System
- 11. Main Fuse
- 12. Cold Weather
- 13. Overheated Engine
- 14. Incorrect Timing Belt or Chain Tension
- How to Maintain Your ATV?
- Bottom Line
ATV not Starting – 14 Common Reasons & Smart Solutions
Discover the troubleshooting guide for ATV enthusiasts. From a low voltage battery to issues in the ignition system, explore 10 common reasons your ATV won’t start and the smart solutions to revitalize your off-road adventures. I have found the following solutions to be pretty effective when finding precise answers to why my ATV won’t start.
1. Check Battery
You need to confirm three things in the ATV battery: sufficient voltage, optimized connections, and whether the battery has gone dead or not.
a. Voltage Check:
Think of your ATV’s battery as the heartbeat of the machine. Without the correct voltage, it’s practically flatlining. Grab a multimeter and check the voltage. Ideally, a healthy battery should boast around 12.6 volts. Anything lower, and your ATV might be staging a silent protest.
Solution:
Charge it up: A good charge is a remedy if your battery voltage is under the weather. Invest in a quality battery charger, give it some time, and let the volts rise. Knowing how long to charge a battery to the required voltage level is crucial.
b. Connections Inspection:

Your battery might be charged and ready to roll, but you’re in for a ride-less day if the connections resemble a spaghetti junction. Corrosion or loose connections can play spoilsport and hinder the flow of power.
Solution:
Clean those terminals: Grab a wire brush and scrub away any corrosion on the battery terminals. Clean terminals ensure a smooth power flow, letting your ATV start up without hiccups.
Tighten it up: Ensure that the battery cables are securely fastened. A loose connection is like a half-hearted handshake – it just won’t do. Tighten those bolts and nuts to guarantee a solid electrical connection.
c. Look for Dead Battery:
Lack of maintenance or on completion of its usual lifetime or the winter hibernation might have caused your ATV battery demise. A dead battery will no way get it started.
If the engine cranks weakly or struggles to turn over, your battery might be running low on juice. If there’s no cranking at all, your battery might have flatlined. It will refuse to hold a charge or consistently show signs of weakness.
Solution:
It may be time to bid farewell and invest in a new, reliable battery. But before that, you can try these battery revival hacks outlined in our how to revive a dead ATV battery guide.
2. Fuel System Examination
Your ATV is a thirsty beast, and if the fuel system faces obstacles, it’s like denying it a drink. Make sure your ATV’s fuel system is in tip-top shape.
Check for Fuel Blockage:
Inspect Fuel Lines: Start by visually inspecting the fuel lines for any visible kinks, bends, or cracks. These could be the equivalent of a roadblock for your fuel journey.
Check the Fuel Filter: If your ATV has a fuel filter (which it likely does), inspect it for clogs or debris. A clogged filter might be preventing the smooth flow of fuel.
Solution:
Clear Blockages: Clear them out if you find any blockages in the fuel lines as it is the answer to, why won’t my ATV start? It could be as simple as removing debris or straightening out a kink.
Replace Fuel Filter: If the fuel filter is clogged beyond redemption, it’s time for a replacement. Think of it as giving your ATV a fresh, clean glass to drink from.
3. Engine Compression Evaluation
Think of engine compression is not pumping strong; your quad might feel under the weather. Perform a compression test and diagnose potential issues.

Compression Test
Gather the Tools: You’ll need an ATV compression tester for this job. Ensure your ATV’s engine is at operating temperature before you start.
Remove Spark Plug: Remove the spark plug from the cylinder you’re testing. This allows the engine to turn over more easily during the test.
Connect the Compression Tester: Screw the compression tester into the spark plug hole.
Crank the Engine: With the throttle fully open, crank the engine several times and note the highest reading on the compression tester.
Compare Readings: Repeat the process for other cylinders if your ATV has multiple. Compare the readings to the manufacturer’s specifications.
Solutions:
Low Compression: If you notice consistently low compression across cylinders, it could indicate worn piston rings or cylinder walls. This is like your ATV having a weak pulse.
Engine rebuilds or overhauls might be necessary. This involves replacing worn components to restore proper compression.
Uneven Compression: Significant variations between cylinders could point to issues like a leaking head gasket or valve problems.
Address the specific issue causing the compression imbalance. This may involve replacing the head gasket or repairing/replacing valves.
4. Fuel in the Tank
a. No Fuel
Isn’t it evident that the ATV won’t start when it is out of fuel? Check your ATV gas tank before you head out into the wild. It’s one of the mandatory inspections you can’t avoid. One good thing about off-road vehicles, you are sure to receive a fuel level warning light when the gas drops.
Solutions:
Refuel it the minute you get back from the ride. Scan for cracks and leaks in the fuel line to fix it before refueling.
b. Bad Fuel (Stale Petrol)
Fuel can be a bit like fine wine – it doesn’t age well. Stale petrol can gum up your ATV’s fuel system, acting like a stubborn barricade to a smooth start.
Stale Odor: If the petrol smells off or resembles varnish, it’s a clear sign of aging.
Discoloration: Fresh petrol is clear and bright. If you notice a dark or cloudy appearance, it’s time to raise the alarm.
Engine Sputtering: Stale petrol can cause your engine to sputter or hesitate during acceleration.
Solution:
Drain the Old Petrol: Don’t hesitate – get that old petrol out of the tank. Use a siphon or remove the fuel line to drain it completely.
Clean the Fuel System: Consider cleaning these components if stale petrol has infiltrated your fuel lines or the carburetor. It’s like giving your ATV’s circulatory system a detox.
Refill with Fresh Petrol: Once the tank is clean, refill it with fresh, high-quality petrol. Think of it as a rejuvenating elixir for your ATV.

5. Confirm the ATV is Not in Gear
Locate the Gear Indicator: Most modern ATVs have a gear indicator on the instrument panel. It’s like the ATV’s way of whispering its secrets to you.
Check the Indicator: Ensure the gear indicator is showing the neutral position. If it’s stubbornly stuck in gear, your ATV might refuse to start up as a silent protest.
Solution: Shift to Neutral
Engine Off: If your ATV is currently in gear, ensure the engine is off.
Clutch Lever: Pull in the clutch lever if your ATV has a manual transmission. For automatics, ensure the brake is engaged.
Shift to Neutral: Use the gear shifter to shift into neutral. Your gear indicator should now confirm the change.
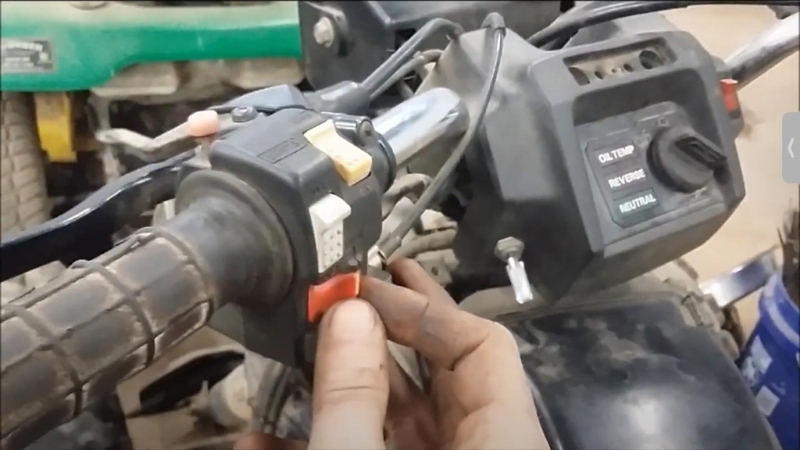
6. Check Kill Switch

Scan the Handlebars: The kill switch is often nestled on the handlebars, within easy reach of your thumbs. It’s a small lever or button that packs a punch.
Inspect the Switch: Give the kill switch a visual once-over. Ensure it’s not stuck or jammed in the off position. It’s like ensuring your ATV has yet to decide to play hide and seek with its switch.
Toggle the Switch: If your ATV has been sitting idle for a while, the switch might have developed a bit of rust or corrosion. Give it a few toggles – on and off – to break any potential grip.
Solution:
Switch to ON: It might sound simple, but sometimes the solution is as straightforward as making sure the kill switch is in the ON position. If it’s in the OFF position, your ATV is on strike.
Clean or Lubricate: If the kill switch feels sticky or resistant, a bit of cleaning or lubrication might be the remedy. Use a suitable contact cleaner or lubricant to ensure smooth operation.
7. Test the Starter Solenoid

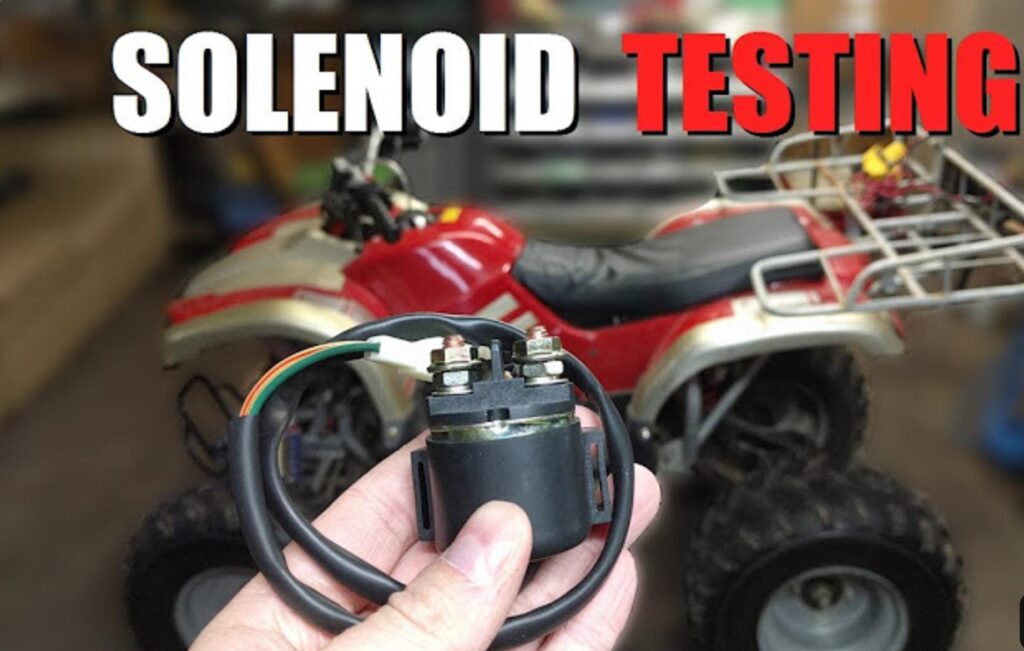
ATV may not start if the solenoid has gone bad. Look for the following signs of a Potentially Bad ATV Solenoid:
Silent Treatment: If you turn the key, and all you get is a resounding silence without the reassuring click of the solenoid, it might be on strike.
Repeated Clicking: A rapid clicking sound when starting the ATV can indicate a struggling solenoid. Perform a Test to see if your ATV solenoid needs to be fixed.
Solution:
Replace the Solenoid: If there’s no click and the multimeter show infinite resistance, your solenoid might be toast. Consider replacing it with a new one.
Check Wiring and Connections: If you hear the click but the multimeter shows no change in resistance, check the wiring and connections. It could be a case of poor electrical contact.
8. Inspecting the Carburetor
Sputtering or Stalling: If your ATV sputters or stalls during operation, it could be a sign of fuel delivery problems.
Difficulty Starting: If your quad struggles to start or doesn’t start, the fuel might not reach the engine.
Locate the Carburetor:
If your ATV has a carburetor, locate it. It’s typically situated near the engine and has fuel and air lines connected to it.
Visual Inspection:
Remove the Air Filter Cover: Inspect the air filter and ensure it’s clean. A clogged air filter can affect the air-fuel mixture.
Check for Fuel Leaks: Look for any signs of fuel leakage around the carburetor.
Solution:
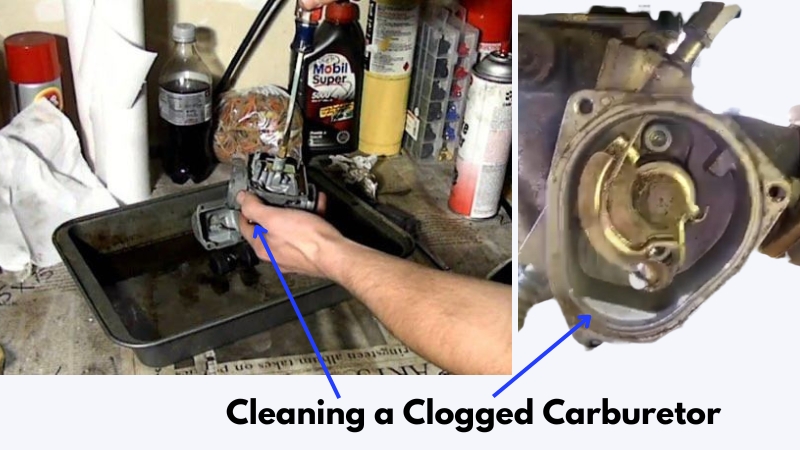
Clean Carburetor: A thorough cleaning should do the trick if the carburetor is clogged. In this case, remove the carburetor for a thorough cleaning. Remove any dirt, debris, or varnish obstructing fuel flow. Pay attention to jets, passages, and float bowls.

Replace Carburetor Components: If cleaning doesn’t solve the issue, consider replacing worn or damaged components within the carburetor.
9. Troubleshoot Fuel Injection
Fuel-injected ATVs have injectors that spray fuel directly into the engine. Locate the injector(s).
Check for Fuel Delivery:
Listen for Injector Click: When you turn the key to the ON position (without starting the engine), listen for a click near the injectors. This indicates that the injectors are receiving power.
Check Fuel Pressure: Use a fuel pressure gauge to check if the fuel pump delivers adequate pressure to the injectors.
Solution:
Address Fuel Injection Issues: If troubleshooting the fuel injection system reveals low fuel pressure or other issues, address them accordingly. This might involve replacing a faulty fuel pump, injector, or other components.
10. Issues in Ignition System
This is the lengthiest of all the methods mentioned in this guide, as it involves the entire ignition system. Start by checking for issues in the system.
No Spark: If there’s no spark when trying to start your ATV, the ignition system might be the culprit.
Inconsistent Spark: An inconsistent or weak spark can lead to misfires and poor engine performance.
a. Evaluate the Spark Plug:
Locate the Spark Plug: Find the spark plug on your ATV’s engine. It’s usually connected to the ignition coil with a spark plug wire.
Remove the Spark Plug: Carefully remove the spark plug from the engine.
Check for Fouling: Look for fouling signs, such as carbon deposits or a wet appearance. Also, check for the spark plug gap if it differs from the user manual. This video will help you identify the common issues from spark plug.
Solution:
Clean it: Clean the spark plug and do it regularly will eliminate the issues with a spark plug.
Replace: Spark plug looking white and yellowish from rusting will not do merely with cleaning. The smart solution here is to replace it with a new one.
Ensure the spark plug gap is within the manufacturer’s specifications. If it is not, replace the spark plug with a wrench (they are pretty cheap but should fit your ATV model and engine).
b. Observe the Spark:
Reconnect the Spark Plug Wire: Reattach the spark plug to the spark plug wire.
Ground the Spark Plug: Hold the threaded part of the spark plug against the engine block or another grounded metal surface.
Attempt to Start the ATV: Turn the key and observe the spark plug for a visible spark. If a bright blue spark is not seen, further test of the system is the call.
Solution:
Reinstall the Spark Plug: If the spark is strong and consistent, reinstall the spark plug and check for proper engine performance.
Check Ignition Coil: A weak or absent spark could indicate a faulty ignition coil. Test the coil’s primary and secondary resistance with a multimeter.
c. Inspecting the Spark Plug Wire:
Check for Damage: Examine the spark plug wire for visible damage, such as cuts, fraying, or exposed wires.
Secure Connections: Ensure that the spark plug wire is securely connected to the spark plug and the ignition coil.
Set Up the Multimeter: Switch the multimeter to the resistance (ohms) setting.
Test the Wire: Place the multimeter probes at each end of the spark plug wire and check for continuity.
Solution:
Replace the Wire: If the spark plug wire is damaged or shows no continuity, it’s best to replace it with a new one.
This is the easiest fix. There is a kill switch that ATVs use in emergencies to shut down the engine just in time. You may find it as a tether, button, or remote control.
11. Main Fuse
Your ATV should have a main fuse. If it does, your manual knows about it and where it stays. A charged battery should work just fine, but if it doesn’t, the fuse must have blown.
Solution:
Fuses are pretty cheap. Just replace them with one that fits your ATV. Try again.
12. Cold Weather
If you live in an area where temperatures can drop to freezing levels, you already know your ATV is hard to start when cold. It uses battery power to ignite the spark plugs and fire up the engine.
Solution:
ATV won’t start when cold. So, keep your battery warm in winter. If it isn’t possible, get a good battery warmer or at least an engine block heater that will do the job for you.
13. Overheated Engine
Overheating is one of the most common reasons my ATV won’t start. Your engine needs to be cooled down before it can start up again.
Solution:
Let it cool for some time, and try starting again. You might have to replace broken parts like radiators, belts, hoses, or anything else. If the same happens again, you can have guidance from here. But if you are not a DIY warrior, you should contact a professional.
14. Incorrect Timing Belt or Chain Tension
If your timing belt or chain is too tight or too loose, it won’t be able to transfer power to the crankshaft. Thus, your ATV won’t start as expected.
Solution:
So, what to do if your ATV won’t start because of the wrong timing belt and chain tension?
Adjust the tension of the timing belt or chain according to what is mentioned in your manual. If you still need clarification, ask a professional to help you out.
How to Maintain Your ATV?
Here you go with basic maintenance tips all you need to keep your ATV running smoothly.
- Check the oil level regularly and change it according to the manufacturer’s recommended schedule.
- Keep the air filter clean. Dirt and dust can clog the filter, reducing the engine’s performance.
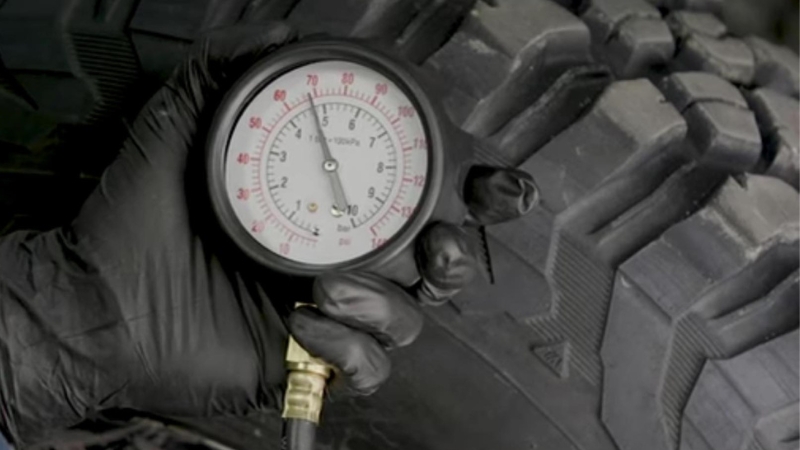
- For optimal safety, inspect your tire pressure regularly and ensure it is properly inflated. Neglecting to do so can lead to wear patterns on the treads and an increased likelihood of a sudden blowout.
- Inspect the brakes and brake fluid regularly. Check for any signs of wear or leakage.
- Check the chain or belt drive for proper tension and alignment. Loose or misaligned drive components can cause excessive wear and damage.
- Ensure the battery is charged and regularly maintained, as a drained or dead battery will hinder your ATV’s ability to start.
- Inspect the suspension and steering for any signs of wear or damage.
- Check for any leaks or damage to the fuel system, including the fuel lines, fuel filter, and carburetor.
- Always consult the owner’s manual for specific maintenance instructions and schedules per your ATV model.
FAQs
Why does my ATV turn over but not start?
Several reasons can cause an ATV to turn over but not start, including issues with the spark plug, fuel delivery, or carburetor. Check these components for proper functioning, and if problems persist, it’s advisable to consult a mechanic for a thorough diagnosis.
How Can I Check If My ATV’s Battery Is the Problem?
To check the battery, you can use a multimeter to test the voltage. A fully charged battery should have a voltage of 12.5 or more volts. The battery may need to be charged or replaced if the voltage is lower. Also, check the connections and terminals for any loose or corroded wiring.
My ATV Won’t Start after Checking the Battery; what Should I Do Next?
If you’ve checked the battery and it’s not the issue, the next step would be to check the spark plug. A faulty spark plug can prevent the ATV from starting. You can test the spark plug by removing it from the engine and checking for a spark when you turn over the engine.
Can a Clogged Air Filter Cause an ATV Not to start?
Yes, a clogged air filter can restrict airflow to the engine, preventing the ATV from starting. This is because the air filter is responsible for removing dirt, dust, and debris from the air before it enters the engine, so if it’s clogged, the engine may not be able to start.
What should I do if my ATV won’t start but makes a clicking noise?
Does your ATV fail to start but instead make a clicking noise? This issue could mean you have either a battery or a starter problem. To troubleshoot, first assess the battery’s charge level; if it is low, recharge or replace it. On the other hand, if the power supply looks okay, then likely there is something wrong with your starter – requiring inspection and possibly replacement to get back on track.
Bottom Line
Whether you are a veteran off-roader or a novice mastering off-roading skills, you want your machine to stay running in peak condition. To avoid unnecessary frustrations, always keep up with maintenance checks and diagnostics if you encounter any problems. With enough care and extra attention, you should have no more issues with your ATV starting properly.
Enjoy the ride! Happy trails! Atv-ing around just got a whole lot easier!

ATVNotes is an off-road resource focused on ATV and UTV winching, recovery systems, safety gear, tires, batteries, and essential off-road equipment. Content is produced by the ATVNotes Expert Team and written from the perspective of a practical off-road recovery advisor, emphasizing real-world performance, system compatibility, and safety-first practices across trail riding, utility use, and off-road exploration.
